Focus HMI – Print to File
There is a “Print to File” option in the printer function of Focus HMI panels. With this command, you get the image of the object or screen as PNG.
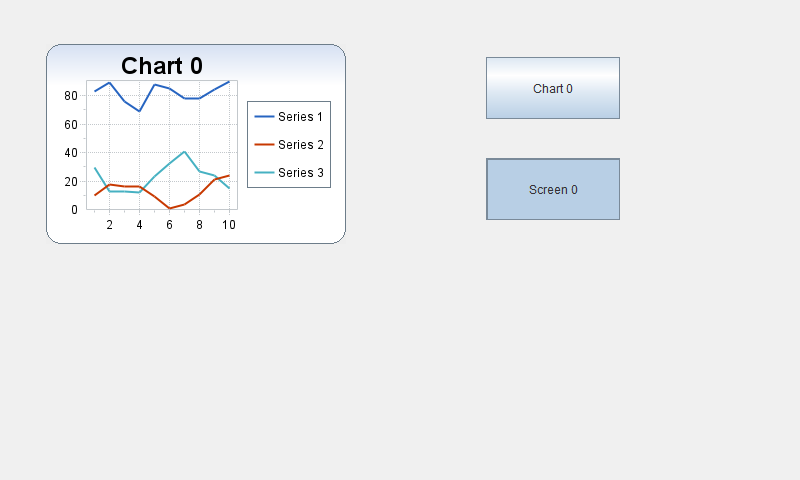
First of all, let’s make the necessary arrangements in our project in focus hmi. I created a sample screen for this.

Here, when I press the Chart 0 button, we will save only the chart and when we press the Screen 0 button, we will save the image of the entire screen.
For this operation, we add a new function from the function settings of the Chart 0 button. On this screen, we select the Print parameter and select the object what we want to save. Then we choose the Printe to File option as the printer.
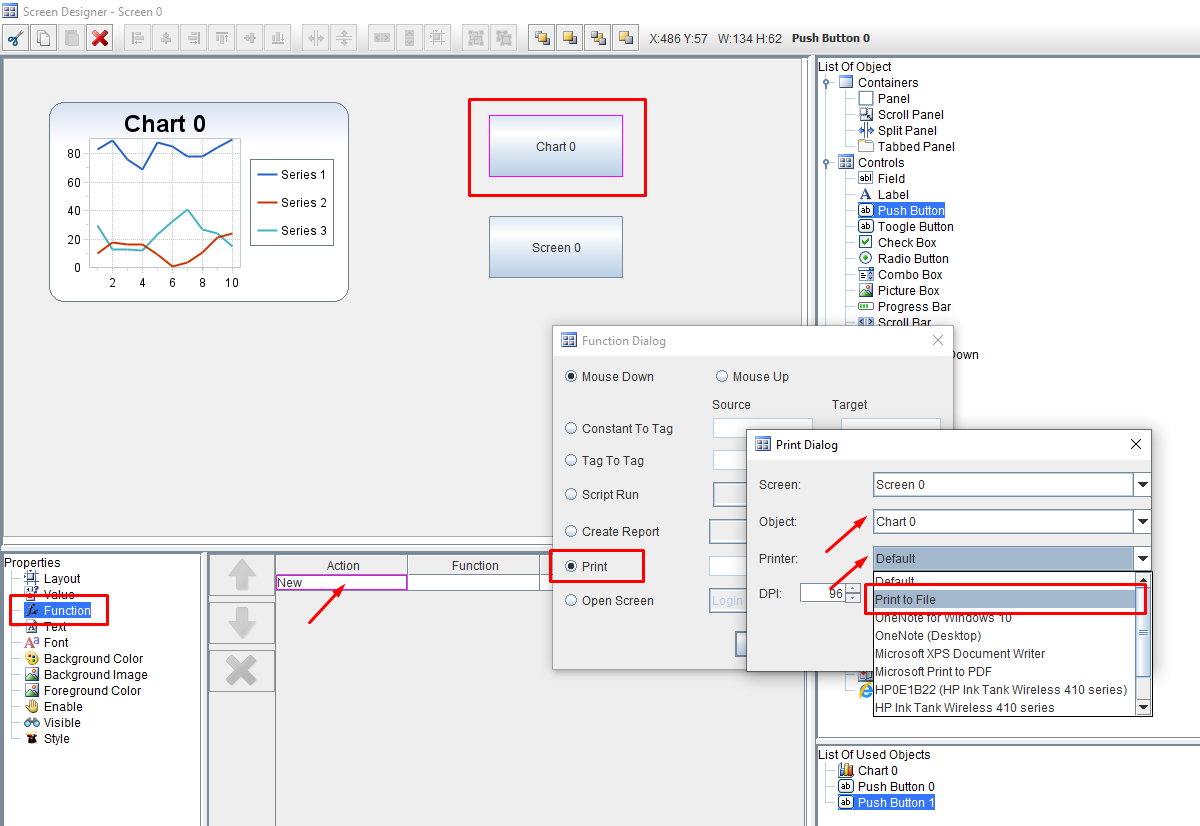
Let’s do the same for the Screen 0 button. In the Screen 0 button, let’s choose the Entire Page as the object.
Web Server
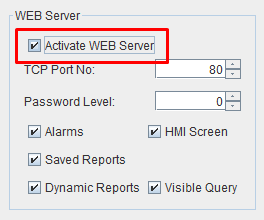
If we want to access these documents from the web interface , we need to activate the Web Server section in the Setup.
After doing these operations, we can connect to the web server.
Press the buttons on the HMI and save the images. Then type the ip address of the device into the browser.
192.168.0.11:80 // our port number 80
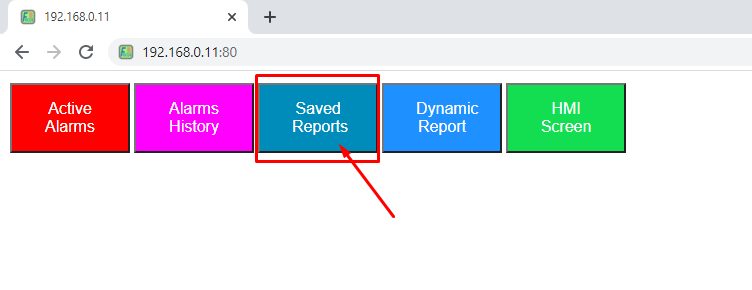
Click on “Saved Reports” on the screen that opens.
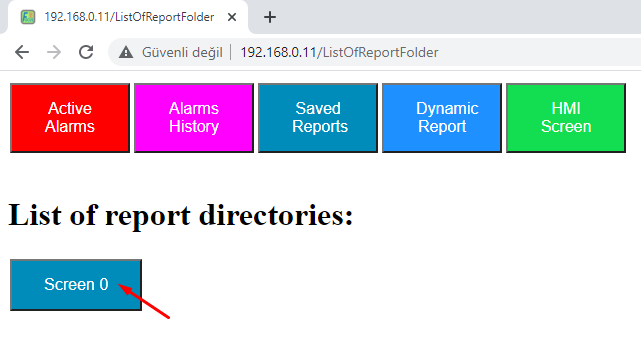
Select Screen 0 from the listed reports.
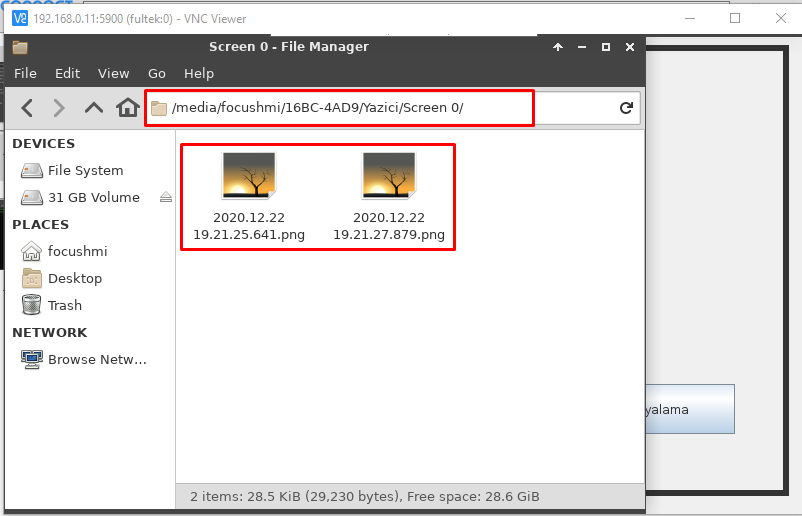
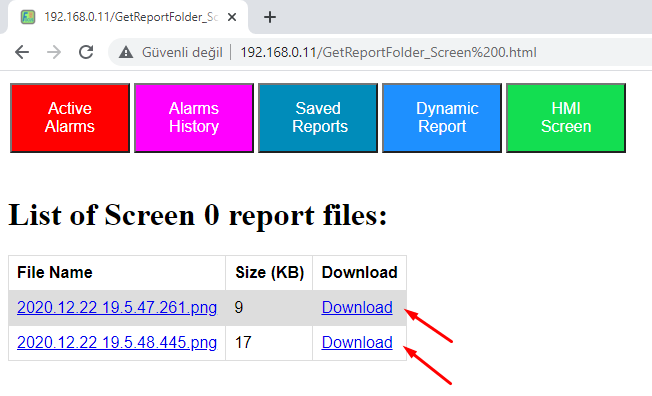
You can download the images that we recorded on this screen.

Copying to USB Memory
We need to create a Script to copy these recorded images to USB.
In the script, we need to include the extension of the USB memory that we want to copy. For this, plug the USB memory into the Focus HMI panel. Then connect to the panel via VNC Viewer. (Click to use VNC Viewer.)
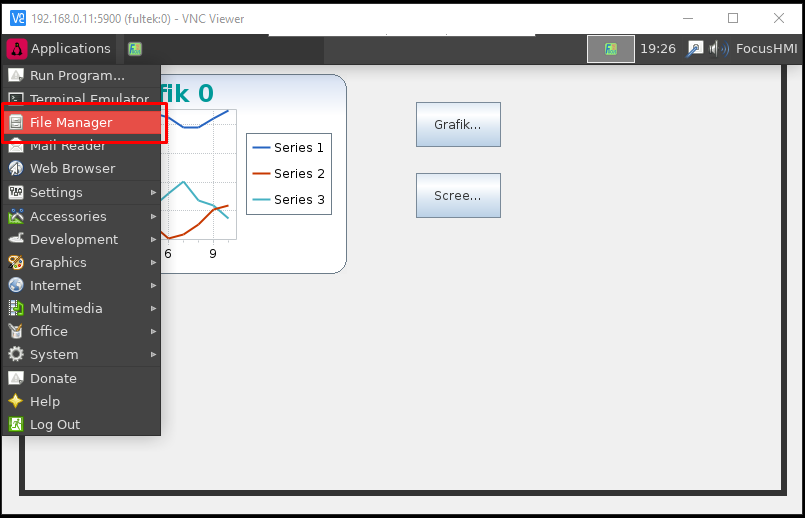
After connecting to the panel, let’s open the File Manager tab from the Applications menu on the top left of the device.
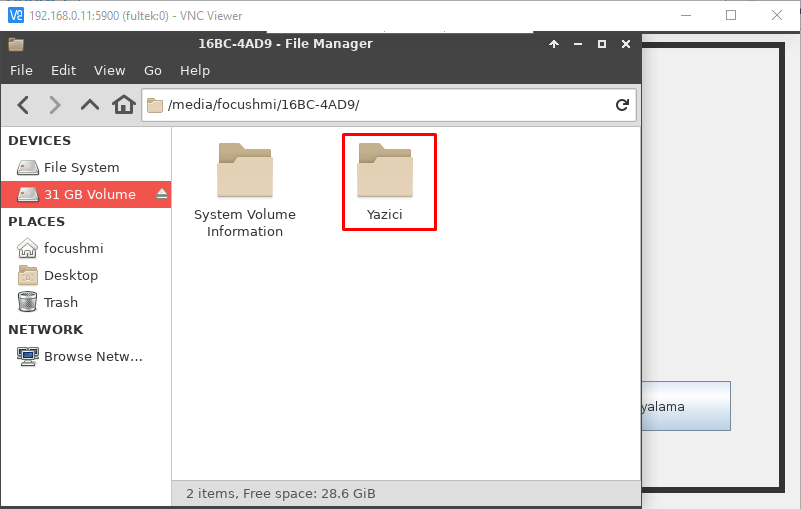
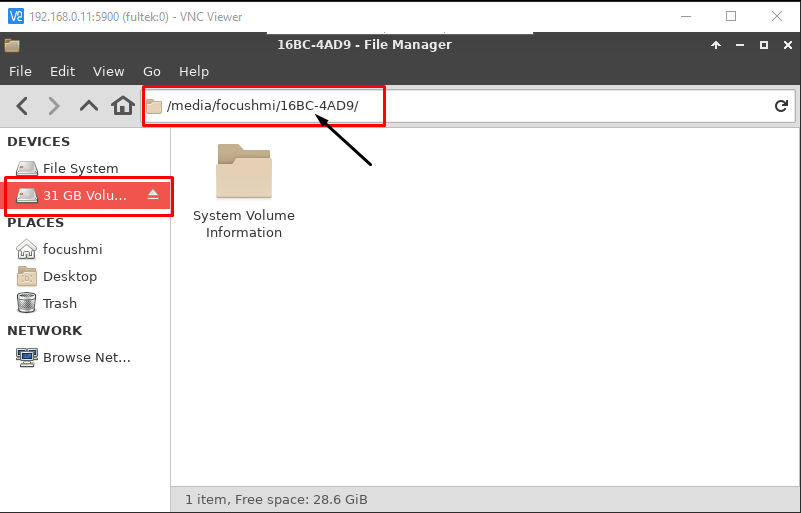
On the page that opens, you can see the USB memory in the Devices section in the menu on the left. When we select our USB memory, we can see the memory name and extension in the top menu. Let’s register this extension.
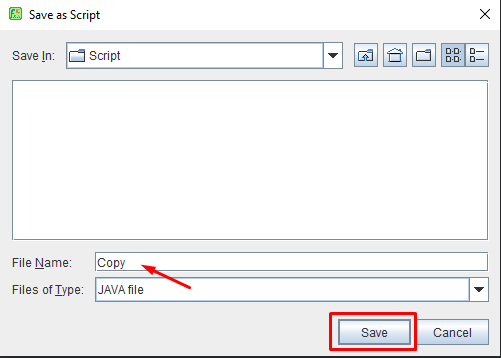
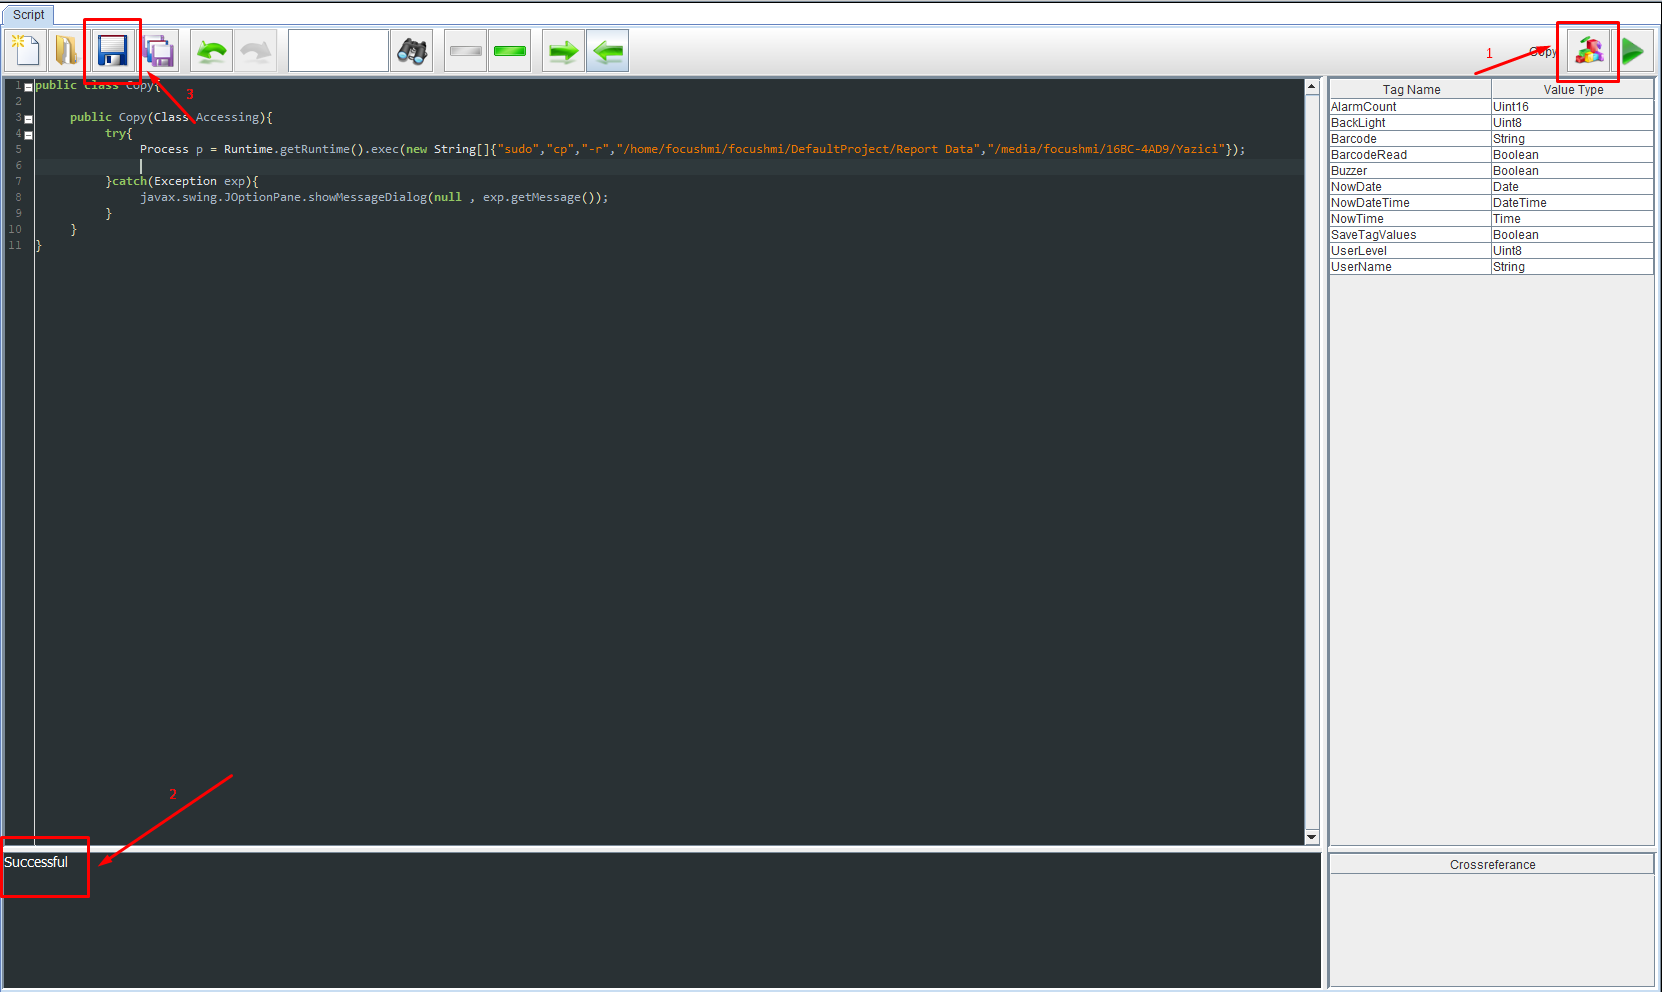
Let’s create a new script from the Script section on the computer (1). And press the save button (2).
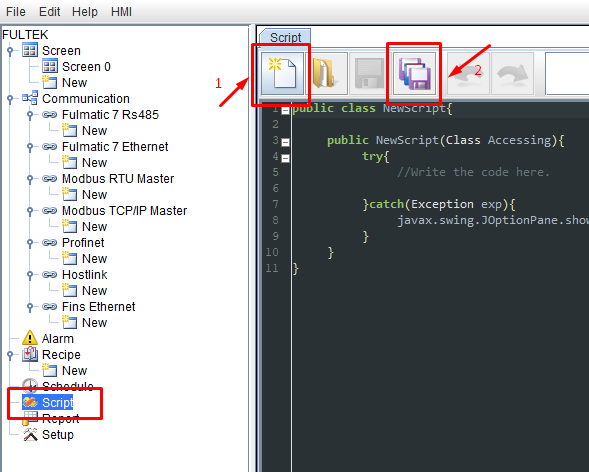
Enter the name of the script and press the Save button.
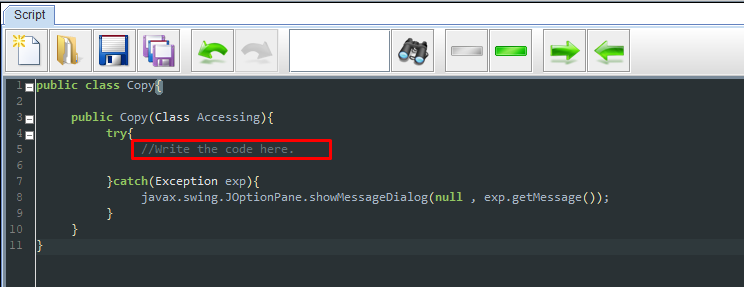
Write the following code in the marked place.
Process p = Runtime.getRuntime().exec(new String[]{"sudo","cp","-r","/home/focushmi/focushmi/DefaultProject/Report Data","/media/focushmi/16BC-4AD9/Yazici"});The part marked in red should be the file path of the USB. The green text will be the file name you will create on your USB.
After completing the writing process, we compile our article by pressing the top right button (1). After this process, we should see the text “Succesful” at the bottom left (2). Then we save our script by clicking the Save(3) button.
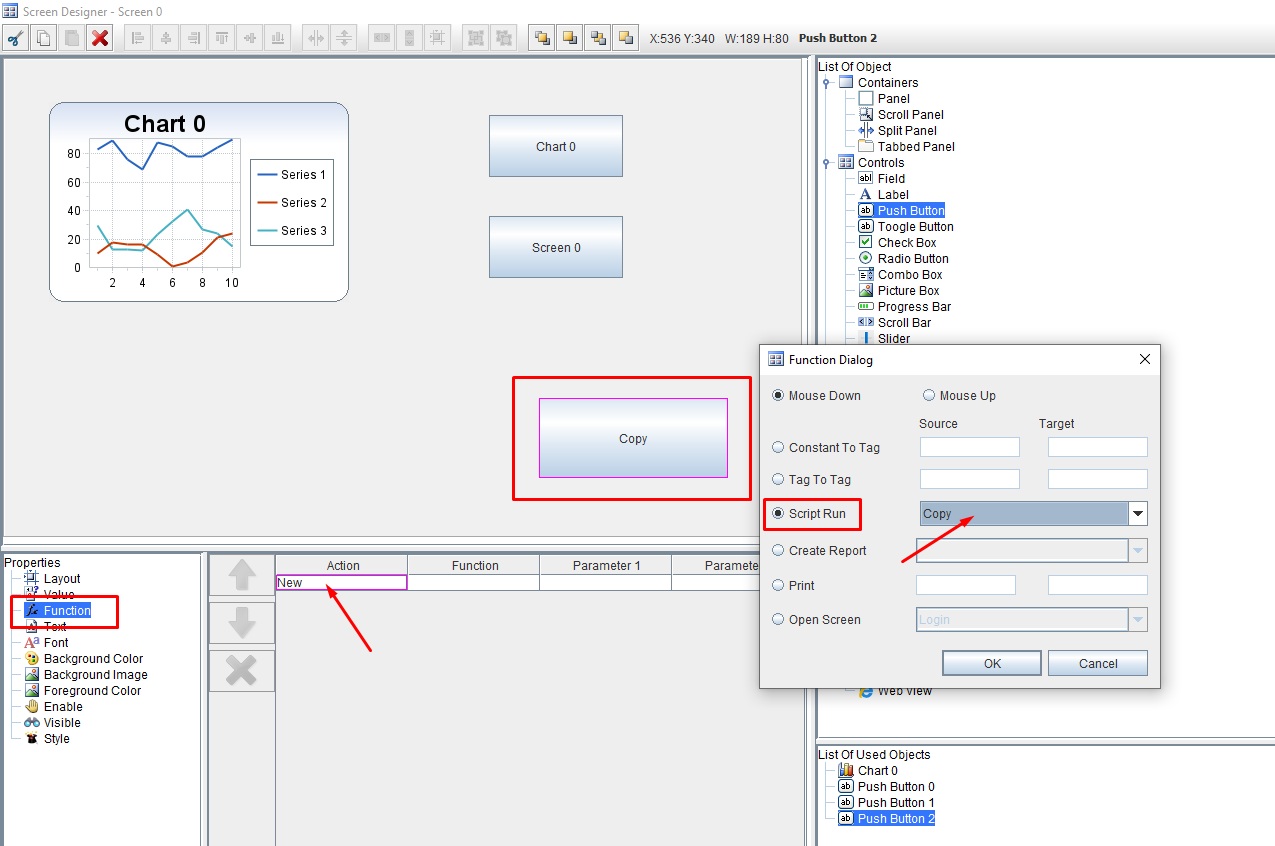
After creating our script, we need to add a new button to our project. We will do the copying process with this button.
We add a new function from the Function section to the button we added. Select “Script Run” as the parameter and select the script we created.
Save the project and upload it to the HMI panel.
Press the buttons to get their images on the panel. When we press the copy button, it will copy these images to the USB memory.